MOVIN TRACIN · MOVIN Studio Usage Guide
Import Character and Retargeting
On this page
Goal of this chapter: Your own character is imported, mapped to MOVIN's skeleton, and moves naturally with your actor.
MOVIN Studio can retarget your motion to your own 3D character, so it moves naturally with its own proportions and skeleton.
Before you start: prepare your character file
- The file is .fbx, .vrm or .warudo
- The file contains a mesh, not just a skeleton
- The skeleton has one hip joint, with a parent joint
- The upper and lower body are in one hierarchy
- Bone names have no typos or duplicates
Only the skeleton and mesh are used for retargeting - materials and textures are not imported.
Recommended bone hierarchy
Retargeting works best when the bones follow the structure of a human body:
- The Pelvis is the root bone and connects both legs.
- The spine runs from the Waist to the Chest. The Chest connects both arms and the head.
- Each arm runs Shoulder → Elbow → Wrist, and each finger connects directly to the Wrist.
- Each leg runs Hip → Knee → Ankle → Toe.
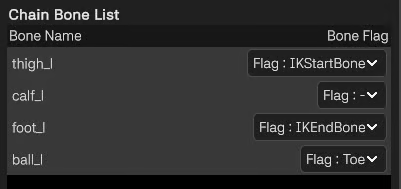
Recommended bone hierarchy
If a bone breaks this structure, Import Issues tells you which one, e.g. Head: not under the chest.
For the best results, match your character's joint hierarchy and bone names to one of these samples:
Get to know the Import Character screen
When you import a character, MOVIN Studio opens a 5-step window that fits the character to MOVIN's skeleton. The same window opens later as Retarget Settings, so you can come back and change anything.
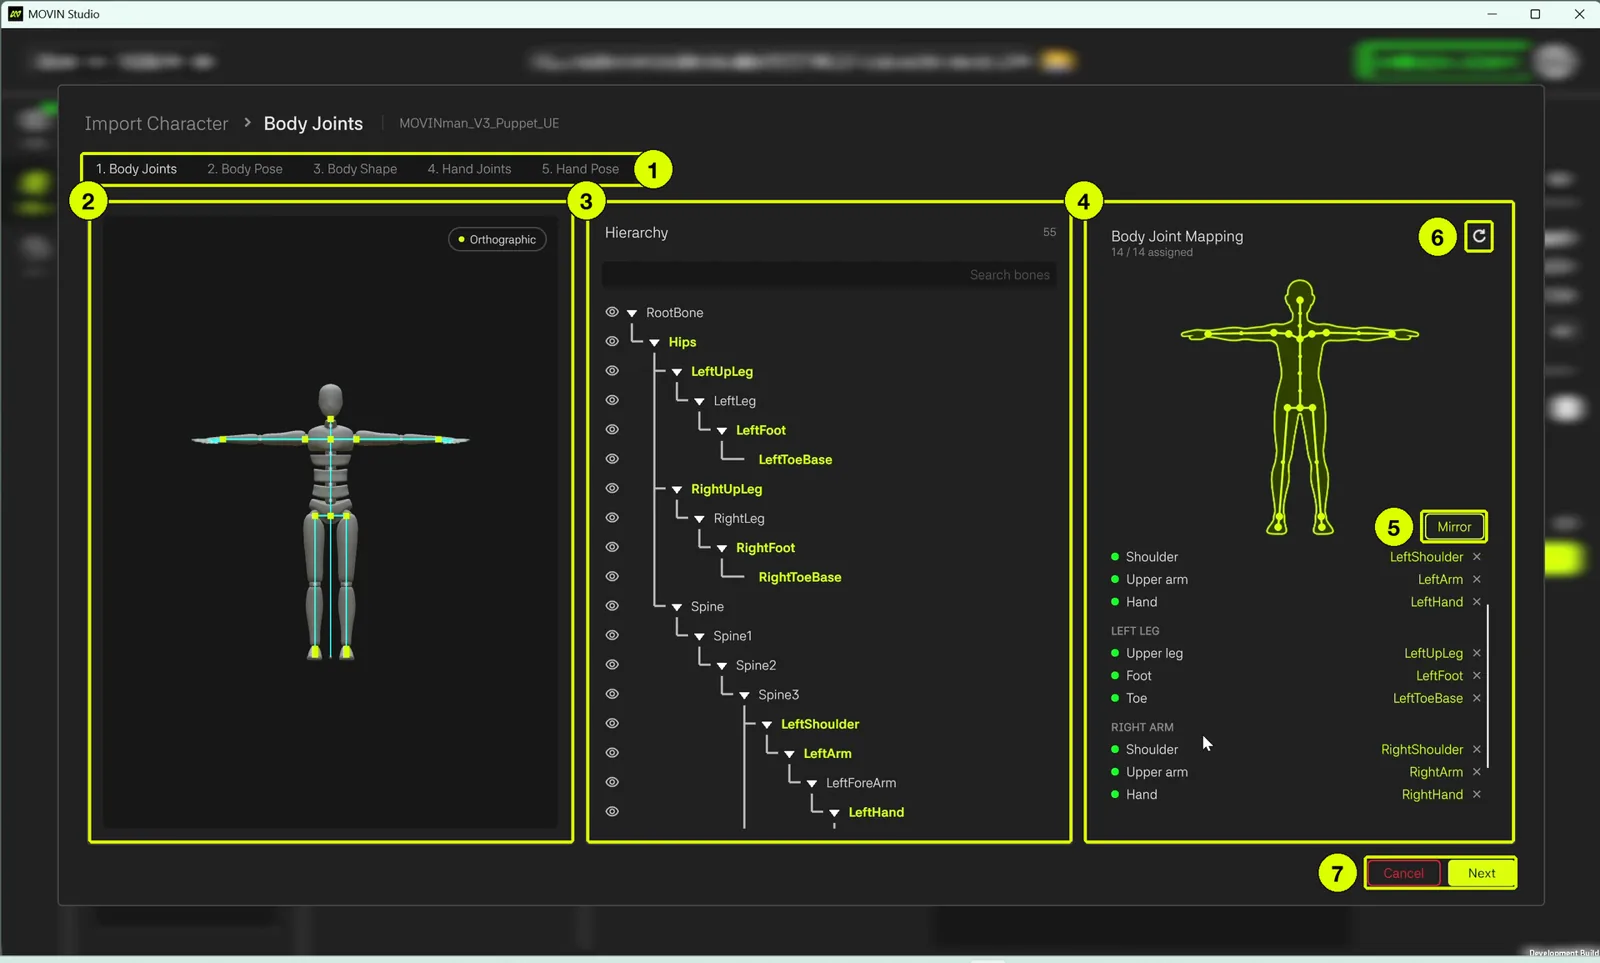
- Steps: 1 Body Joints → 2 Body Pose → 3 Body Shape → 4 Hand Joints → 5 Hand Pose. A check mark appears after each finished step - click a finished step to go back to it.
- Rest pose preview: your character in its rest pose. Hover over a joint to see its name, and click it to select that bone. Orthographic shows the view without perspective.
- Hierarchy: every bone in your file. Assigned bones are highlighted. Use Search bones to find one, and click the eye icon to hide a bone (and everything under it) from the preview - it only changes the view, not the mapping.
- Joint Mapping: which bone is assigned to each joint, as a diagram and a list. The counter shows how many are assigned, e.g. 14 / 14 assigned.
- Mirror: copies your left-side assignments to the matching right-side joints.
- Reset (↻): puts everything on this step back to how it was first imported.
- Cancel / Back / Next: move between steps. On the last step, Next becomes Import.
Move around the preview: right-drag to rotate, scroll to zoom, and middle-drag to pan. Double-click a bone in Hierarchy to jump to it.
On Body Pose, Body Shape and Hand Pose, the left column plays a sample motion on your character instead, so you can watch each change take effect. The rest pose moves to the middle.
Import Issues appear next to the buttons at the bottom when something in the mapping needs attention, e.g. The left upper arm is not assigned, so the character's left arm will not follow the motion. Click it to see every issue.
How to import a character: Step by Step
-
Click Import Character
- In Capture, open the Characters tab in the left panel and click Import Character.
- Select your .fbx, .vrm or .warudo file. The Import Character window opens.
Selecting several files at once imports them all with the default settings, without opening the window. You can adjust each one later with Retarget Settings.
-
1. Body Joints - check the body mapping
MOVIN Studio assigns standard bone names for you. Check that each joint - hip, head, shoulders, arms, hands, legs, feet and toes - has the right bone. Hip is the only joint required to import. To use the corrections on Body Shape, also assign the Head and both arms with their hands - the arms have to branch off a bone above the hip.
To change an assignment:
- Select the bone - in Hierarchy, or by clicking it in the preview.
- Click Assign on the joint's row, or click the joint on the diagram.
- Click × to unassign a bone.
- Click an assigned bone's name to find it in the preview.
- One bone can be assigned to only one joint.
- Assigned the left side? Click Mirror to copy it to the right.
Click Next.
-
2. Body Pose - match the reference pose
Base Body Pose sets the reference pose used to retarget body motion. Watch the motion on the left as you adjust.
- Arm Twist: rolls each arm along its length, which changes the direction the elbow bends.
- Leg Twist: turns each whole leg - knee and foot together. Toward Toes Out turns the feet out; toward Toes In turns them in.
Both arms and both legs are adjusted as mirror images. Click Next.
-
3. Body Shape - fit motion to your character's body
Use these when your character's body is shaped differently from a person's - e.g. a wider torso or shorter arms.
- Adapt Arms to Body Shape: moves the hands so they don't go through the character's body.
- Hand Correction Range: how far from the body the correction starts.
- Preserve Fast Arm Swings: reduces the correction during fast arm swings.
- Keep Foot Spacing: keeps the actor's foot spacing. Set Foot width so the guide fits the inside of the shoe.
- Preserve Hand Contact on Knees: keeps the hands on the knees when the actor touches them. Set Hand length and Knee size so the guides fit.
- Shape Fitting: drag the handles in the Front and Side views so the body shape fits your character's body.
Turn on Compare, Hand trails or Body shape above the preview to check the result. Click Next.
- Adapt Arms to Body Shape: moves the hands so they don't go through the character's body.
-
4. Hand Joints - check the finger mapping
- Hand Joint Mapping shows the bone assigned to the first joint of each finger - Thumb, Index, Middle, Ring and Pinky - on both hands. MOVIN Studio follows the rest of each finger from there.
- Change an assignment the same way as on Body Joints: select the bone, then click Assign or the finger on the diagram.
Click Next.
-
5. Hand Pose - adjust the hands, then import
Click Actor Left Hand, Character Left Hand, Actor Right Hand or Character Right Hand above the preview to zoom in on a hand. Every setting applies to both hands.
- Base Hand Pose: the reference pose of the hands.
- Hand Forward / Back, Hand Up / Down, Hand Twist: angle the hand at the wrist, or rotate the palm.
- Straighten Fingers: straightens every finger joint except the thumbs.
- Thumb Base Rotation, Thumb Alignment (Keep Angle ↔ Fully Aligned), Thumb Twist: set the thumb's resting angle.
- Thumb Motion: Thumb swing across palm and Thumb lift from palm - how much the thumb base moves during motion.
- Fist Shape: Index / Middle / Ring / Pinky curl - how much each finger bends at its base when making a fist (Less Curl ↔ More Curl).
Click Import. Your character is added to the Characters list.
- Base Hand Pose: the reference pose of the hands.
Required joints missing? Clicking Import asks Import without retargeting? - select Go to Body Joints to fix the mapping, or Import anyway to add it as it is - the unassigned parts won't follow the motion.
Clicking Cancel asks Cancel this import? - select Cancel import to discard everything (nothing is added to the project), or Keep editing to go back.
Use your character
- Select a character: double-click it in the Characters tab. A check mark appears and the character moves with your actor.
- Back to the MOVIN skeleton: double-click the selected character again.
- See the character more clearly: lower Actor Transparency at the top of the Details panel.
- Character info: the Details panel shows the selected character's name and number of bones under Characters.
Change retarget settings later
Retargeting is how MOVIN Studio fits your actor's motion to a character's skeleton. You set it up while importing, and you can change it anytime in the same 5-step window - this time every step is open, so jump straight to the one you need.
There are two places to open it, depending on what you want to change:
| Open | Where | What it changes |
|---|---|---|
| Retarget Settings | Capture → select the character → Details panel → Characters | The character itself: live capture and streaming with it, and clips you retarget to it afterward. Click Save to keep your changes. |
| Clip Retarget Settings | Clips → open a retargeted clip → Details panel | Only that clip. Click Save to Clip to keep your changes. The character and your other clips stay as they are. |
Which step fixes what?
- A body part doesn't move, or moves the wrong limb → Body Joints
- Elbows bend the wrong way, or the feet point oddly → Body Pose
- Hands go through the body, or feet slide together → Body Shape
- Fingers don't move, or the wrong finger moves → Hand Joints
- Hands rest at a strange angle, or the fist looks off → Hand Pose
Closing the window with unsaved changes asks Discard changes? - select Discard changes to throw them away.
To retarget a clip you've already recorded, see Retarget a clip to a character.
Rename or delete a character
- Rename: right-click the character and select Rename, or click it slowly twice.
- Delete: right-click the character and select Delete. To delete several at once, hold Ctrl and click each character first.
Your character is ready. Next, record with it - or retarget a clip you already have.
→ Recording